In this article, you’ll learn to setup the kubernetes environment in your system and also you will learn the usage of the “Kubectl” CLI to be familiar with Kubernetes Environment
Introduction
Kubernetes is nothing but the platform for working the contains. Kubernetes is one of the best container orchestration engines which manages the containerized apps at a very large scale. Kubernetes provides standard deployment interface, but the key features of Kubernetes are “Deployment”, “scaling” and “Monitoring” of containers. The latest stable Kubernetes version is 1.11.6.
Kubernetes overview at a very high level
Kubernetes architecture consists of one master node and multiple worker nodes. For simplicity purpose I have taken example of one master node and two worker nodes here.
Worker node: The worker nodes are nothing but the Virtual machines or a physical server running within your data center or it could be a cloud. They expose the underlying computation, networking and storage resources to the applications. All these nodes join to form a cluster with provided fault tolerance and replications.
Pods: Pod is nothing but a basic scheduling unit in Kubernetes. Each pod consists of one or multiple containers. In most cases there would be one container. There are scenarios where we need to run two or more dependent containers together within a pod with one container will be helping to another container. So, with the help of pod, we can deploy multiple dependent containers together. So, pods act as a wrapper around the container.
We interact and manage containers through pods.
Containers: Here containers are the run time environment for the containerized application. Containers reside inside the pod.
Master: Mastertake care of for managing the whole cluster. It monitors the health check of these nodes. It stores the information about the members of the cluster and their configuration. So, when worker node fails, it moves the work load from the failed node to another healthy worker node. Master coordinates all the activities inside the cluster.
Master is mainly responsible for scheduling, provisioning, controlling and exposing API to the clients.
Setting up Kubernetes environment
Installation methods of Kubernetes:Different options are available to install Kubernetes on personal laptop, physical servers and virtual machines and as a cloud service.
Different ways according to the need:
- 1. Play-with-k8s: This is ideal for someone who does not want to install anything on their system or laptop but they want to test and learn about Kubernetes. This is a readymade Kubernetes cluster available online.
- 2. Minikube: This is ideal for someone who want to install Kubernetes on their system but has a very limited system resources. This does not have a separate Kubernetes master and worker node architecture. We will get all Kubernetes component package into one. It is all one setup. Same system work master and the same system work as Kubernetes worker node.
- 3. Kubeadm: Kubeadm is a way to go if we want to get actual real time setup. Using this we can setup multimode Kubernetes cluster.
Beside these there are other 3 popular cloud-based platforms which offers Kubernetes services on their platform.
- Google Kubernetes Engine (GKE)
- Amazon Elastic container services for Kubernetes (AEK)
- Azure Kubernetes service. (AKS)
Play-with-k8sInstallation
Here in this session, I will create 4 VM instances (one for master node and 3 for worker nodes) on play-with-k8 website. One will be the master and 3 will be the worker node.
Here we will be going to perform the following steps:
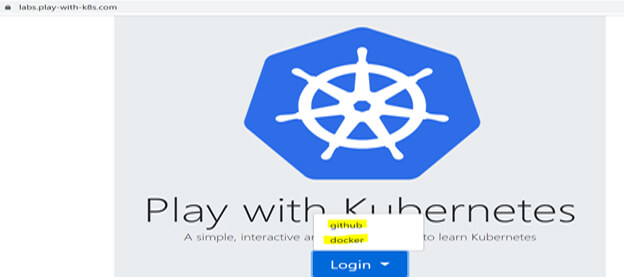
- We will initialize the master node and will install pod network plugin on it. To login to the website you need to have either GitHub or docker account. Now navigate to the website(https://labs.play-with-k8s.com/) to the landing page like below:
- So, here I am using my GitHub account to login to the website. Now after successful login you have to click the start button to start with the session:
- After start button pressed, we will navigate to the main page of play-with-Kubernetes website. Here we can create VM and deploy the application. The time limit you can see is 4hrs.
- We will configure the remaining 3 nodes as worker nodes and will join them to the Kubernetes cluster.
- Now we will setup the Kubernetes cluster with 4 VM instances. Where Node 1 will be configured as Kubernetes master. Node 2,3 and 4 are worker nodes.
- Create instance by clicking the “Add New Instance” button in the lest corner of the above image. Now I have created 4 VM instances clicking the same “add new instance” 4 times like below:
- Now we will configure the Kubernetes master using “kubeadminit” command. Now go to the 1st node terminal and hit the command:
- Then, in order to start using the cluster and to make use of kubectl, we have to run the three below command:
- So, once after issuing the above 3 commands, Let’s start configuring the cluster networking by running kubectl apply command as below.
- With the above command, we can successfully deploy the “weave network” plugin on Kubernetes master. Now we will join worker nodes to the cluster. Now, on node 2, 3,4 we will run the below command on each of these nodes:
Note: You do not need to type these commands manually. You can copy paste the command from that terminal UI.
Now after issuing the above command in three nodes, then we are able to successfully join the three nodes to the cluster.
Testing the Entire Kubernetes cluster
We will first display all nodes of the Kubernetes cluster.
GO to the node 1 i.e. the master node and issue the below command to see all nodes:
- Now you can see that all the 4 nodes are in ready state including master and worker nodes.
- Let’s run and deploy sample nginx application using kubectl command. (You can deploy any of your java development services as per your wish.)
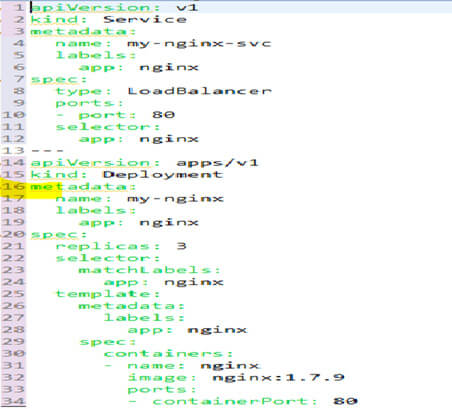
Note: Nginx is an opensource webserver used for load balancing, caching and reverse proxying. It provides http server capabilities also. - Let’s create the nginx-app.yml file as below:
nginx-app.yml:
Let’s run and deploy sample nginx application using kubectl command
Now you can see that nginx deployment and service got created successfully. Now let’s verify the pods.
Here you can see that all 3 pods are in the process of downloading and creating nginx container inside the pod. Let’s wait for 1 minute and now again issue the same command, you can see that pods will be running:
Now we verified that app deployed successfully, and pods are in running state.
Minikube Installation
Suppose let’s think of a Realtime scenario where we want to access Kubernetes from the laptop/system for quick testing purpose. But, at same time, we don’t want to put so much pressure on our system resources such as CPU, RAM and Disk. In this case we will go for minikube installation.
In this type, we will have to download and install Hyper-V or VMware workstation or a virtual box. Here I am going to take virtual box.
- First download the virtual box from google(https://www.virtualbox.org/wiki/Downloads)
- Then we have to create a folder in our local drive and will save all required files like minikube and kubectl in it.
- So now create a folder under C drive. (mkdir kubernetes). We will download minikube executables. If you are running windows OS on your machine then we will have to download windows version i.e. highlighted in below image. Navigate to the GitHuburl to download(https://github.com/kubernetes/minikube/releases)
- Now move the downloaded folder to the “Kubernetes” folder which you have already created. I have renamed the downloaded folder to “minikube” :
- Then we have to download the kubectl binary. (kubectl is a command line tool used to interact with Kubernetes cluster.So, from command line interface, we will issue the curl command to download kubectl binaries:
- Now, we will start the minikube. Once minikube starts, then it automatically downloads the images and configure and starts the Kubernetes services. All this happens in the background automatically. Start minikube as below:
- Let’s see the automatic Virtual machine creation in the VirtualBox during the above process. You can see in the virtual box that minikube will get created and will be running:
- Minikube will download and install the required packages. So, wait for some time till the execution completes successfully. If you face any errors during this process, then you have to go to the log folder in the virtual box inside the home directory. In worst case you have to remove your virtual box and have to install it again.
To check if minikube is running or not please issue the command “ minikube status”.
- You can see here kubelet and apiserver running successfully and pointing to minikube VM. To display nodes in the cluster, please issue the command:
- So, we can see here from the aboveimage that only one minikube is running and it is in ready state. Minikube is a light weight Kubernetes environment.
Note: Minikube work as a master node as well as a worker node on which we can deploy containers on top of it.
Deployment of nginx application
- Now for deployment of a sample application, we have to give deployment name and container image.(I have used google sample image here but Please refrain from using gcr.io/google-samples images in production.)
- After deployment you can see that there is one pod created as part of deployment process and runningfine. After that you can stop minikube by “minikube stop command”
Google Kubernetes Engine (GKE)
Where and why: Imagine that, we are part of Development team. And management asked todevelop containerized app. Unfortunately, the budget and duration given for this project is very limited. So, now, how can we develop and host that containerized app with all that load balancing, scalability and fault tolerance features within that short duration and budget.
Here we will create Kubernetes cluster on Google kubernetes engine with three worker nodes.
Steps for installation:
- Go to the google cloud dashboard in the browser(https://console.cloud.google.com/home/activity?project=sigma-lane-259620).
- Go to the options and click on the “Kubernetes Engine” to go to the GKE dashboard. As we have not created any cluster so it will show the button create cluster.
- Then click on the “create cluster button” and you will find the cluster template page:
- In case if you are planning to run CPU or memory intensive apps inside this Kubernetes cluster then you can select the respective cluster template. Here I am using the default “standard cluster” template. In the above image you can see that for the standard template, all the required fields on the right side are already prepopulated. We can change the cluster template name. So, we just need to do one click “create” and will go to the next step.
- You can also change the number of worker nodes, CPU cores size for each worker node and other custom fields such as networking logging and scaling.
- Now click “create “and wait for some time till it creates the Kubernetes cluster.
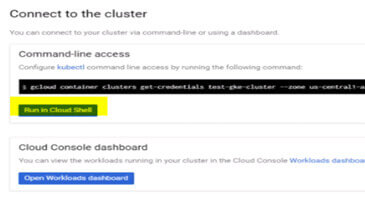
- Now you can see in the above image that we created the cluster successfully. Now click on the “connect” button to connect to the cluster. Now after clicking connect you will find the below page with “Run in cloud shell”:
- Click on the “Run in cloud shell “and it will open the terminal for you. Now we can check the number of nodes running by issuing the below command in the shell:
- As you can see there are 3 worker nodes running successfully. Now let’s display the pods. And now we won’t get any pods because we have not deployed anything.
Deploying the nginx application: We will deploy a sample nginx application and will test the app to make sure if everything works as expected.
- Now let’s deploy a sample nginx application by running the below command:
- Now we can see the pods and the deployments by issuing the below command:
- You can see that there are 3 pods created after the deployment and it is running successfully. Now Let’s explore the GKE dashboard:
- Here in the left you can see all the available options. In “workloads” tab you can find the application thatwe deployed now.
- In “Services” tab you can see the external IP details for the nginx application that we deployed.
- Now let’s access the load balancer IP from the browser.
You can see the default nginx webpage like below :This confirms that our deployment works fine.
Usage of Kubectl
Overview of Kubectl: How can we create and manage Kubernetes objects from command line?
Kubectl is nothing but aCLI toolwith the help which we can run various commands on the Kubernetes objectsinside the Kubernetes cluster. We mostly use kubectl command for creating, updating, displaying and even deleting any Kubernetes objects inside Kubernetes. Here, I will show you some of the common operations that we can perform inside Kubernetes using Kubectl. Some of the common operations are :create, get, describe, delete, exec and logs.
In Kubernetes we manage resources using kubectl command line utility. All Kubernetes commands starts with kubectl. Let’s see the syntax of kubectl.
Command: defines the operation to be performed on resources. For ex. Create, get, describe, delete, logs, exec etc. All these are operationsoperate on some resource type inside Kubernetes.
Type: It is the resource type and Types we can write either in upper case or lower case.Also,can ne used in singular or in plural forms.We can use in abbreviated format. Most frequently used resource types:[pod(s) or po, deployment(s) or deploy, replicaset(s) or rs, replicationcontroller(s) or rc,service(s) or svc , daemonset(s) or ds , namespace(s) or ns , persistentvolume(s) or pv, persistentvolumeclaim(s) or pvc, job(s), Cronjob(s) ]
Name: Name of the object
Flags: If we want to frame the output in a specific manner then we use flag for ex. If we want to put wide command output, then we can use -w as a flag.
So here in the above case, I have mentioned a sample kubectl command where I am displaying the pod named nginx-pod with a wide output. Let’s start with all commands with examples:’
Kubectl create and get command
To create Kubernetes object inside Kubernetes we will use the kubectl create command. We will pass the Kubernetes manifest file as arguments to this command. This can be json or yaml format.Generally manifest files are written in yaml format.
Let’s look at some of the example:
- $kubectl create -f pod-example.yml –> here pod-examle.yml is the manifest file that contains pod definition and container images that we want to deploy
- How can we create objects from multiple files? We can do this by having all the yaml files inside a directory. After that we can create object in one step. –> $Kubectl create -f (Here inside this directory we have to place all the yaml files for pod creation yaml and deployment yaml.)
- Now for displaying the resources, we will use get command. Suppose after pod creation with create command then if we want to display the pods inside Kubernetes cluster “kubectl get pods” command. In case if we know the pod name or just want to print the specific pod information then we have to pass pod name in the command. To which node it is running then we have to pass the flags that is “-o wide “option i.e. ->$kubectl get pods -o wide.
- If we want to get the deployment details on the pods then we can issue command:$kubectl get pods deploy
Kubectl describe and delete command
If we want to display complete output of a specific resources including the list of events, then we will use the command: “kubectl describe [TYPE] [NAME]”. This command is helpful in troubleshooting purpose.
Kubectl get vs describe command
‘Kubectl get’ will displace high level information of a resource. Whereasdescribe will display complete details of a specific resource (like pod details or a node detail) including the event triggered by the resource. Example:
So, the above commands are self-explanatory.
Kubectl delete:
To delete all resources create by the manifest file we will use the command kubectl delete followed by the manifest file.
In case we have to delete all the services and the pods that have the label name then we will issue the below command:
To delete all the resources of pods we can issue command: “kubectl delete pods -all”
Kubectl exec and logs command
- Now we will see how to first get information from the container. So, to print the date from the running container We have to issue below command.
- If in such cases where pods with multiple containers, then to interact with specific container, we have to pass the container name details for which we want to get the date.
Note: Make sure you are executing these commands from the master node not from the worker node container. - If we want to get inside the container then we have to use exec command with “-it”option.(it means interactive terminal)
- The above command will take us to the specific pod and will provide interactive bash prompt to execute the commands.
Logs command:
Now, how can we print the logs of a container. Imagine that we have scheduled a pod and when it is created this pod will display 1 to 10 and goes off. So, to see the output of this type:
Now to stream the logs from a running pod we have to use “-f” option similar to tail -f in linux commands.
Conclusion
Here you learn that you can install and configure Kubernetes in different ways according to your requirement. And also, you have got the idea to make use of Kubectl command. In our other blogs you will find the advance concept of Kubernetes.


